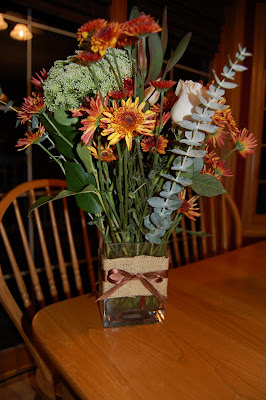
I remembered a stash of burlap I had purchased at Hobby Lobby over the summer. I knew instantly what I wanted to do!
To decorate and "harvest" up any vase, jar, votive or even a pillar candle, you'll need burlap, double stick tape, ribbon and scissors. I used ribbon I had on hand---1/2" brown satin. I would've preferred wider ribbon, but didn't want to run out to the store.
I planned on "shabby-ing up" the 2 rectangular vases and 8 votives.
First, I cut two strips of burlap, about 3" wide and long enough to wrap around the vase. Using two rows of double stick tape, I attached the burlap to the vase, about 2" down from the top---which covered perfectly the surface of the water that can get scummy looking. Yeah!
Next, I measured a length of ribbon that could wrap around the burlap twice---in order to beef up my skinny ribbon. I tied the ribbon in a bow and, voila! Done!
For the votives, I took a long strip of double stick tape and pressed it onto the burlap. I used the width and length of the tape as a guide for cutting the burlap, which also helped minimize the burlap fraying and shedding.


I love decorating with burlap. Very clever!
ReplyDeleteThanks,
Nancy
Thanks, Nancy! It's my first burlap project! I'm a new fan!
ReplyDelete